
Why You’ll Love this Christmas Fudge Recipe
There’s something magical about this Christmas fudge recipe that makes it a must-have during the holiday season.
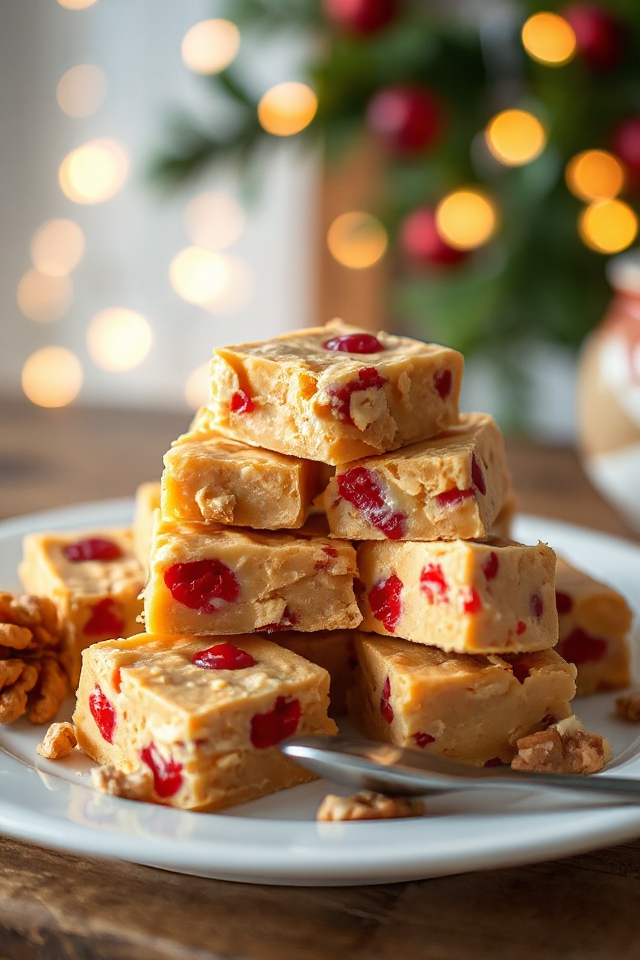
I remember the first time I made it; the sweet aroma filled my kitchen, instantly putting me in a festive mood. The creamy texture melts in your mouth, and the combination of butterscotch and candied cherries creates a delightful burst of flavor.
This fudge isn’t just a treat; it’s a tradition I cherish sharing with family and friends. I love how it brings everyone together, sparking joy and laughter as we indulge in this rich confection.
Plus, it’s simple to make! You’ll find yourself wanting to whip up batch after batch, ensuring there’s always a little extra to gift to loved ones during this special time.
Ingredients of Christmas Fudge
When it comes to making Christmas fudge, having the right ingredients is key. This recipe is incredibly straightforward and uses a few classic baking staples that you might already have in your pantry, plus some delightful add-ins that really make the fudge shine.
Whether you’re a seasoned baker or someone who usually sticks to cookies, this fudge recipe is perfect for everyone. So, let’s gather our goodies and get ready to create some holiday magic in the kitchen.
Here’s what you’ll need to whip up a delicious batch of Christmas fudge:
- 5 cups sugar
- 1 (13 ounce) can evaporated milk
- 1/2 cup butter
- 1 (13 ounce) jar marshmallow cream
- 1 teaspoon salt
- 1 teaspoon vanilla
- 1 cup chopped walnuts
- 2 (12 ounce) bags butterscotch chips
- 1 cup candied cherries (cut up)
Now, before you dash off to the store, there are a couple of things to keep in mind.
First, let’s talk about the sugar. Using granulated sugar is a must because it helps achieve that smooth texture.
Also, if you or someone you know isn’t a fan of walnuts, feel free to swap them out for pecans or just leave them out entirely.
And those candied cherries? They’re not just for looks; they add a sweet and tart burst of flavor that balances the richness of the fudge.
How to Make Christmas Fudge
Making Christmas fudge is like starting a little culinary adventure, and trust me, it’s a journey worth taking. Start by grabbing your large 4-quart saucepan because we’re going to need some serious space for all that deliciousness.
First things first, toss in 5 cups of sugar, a 13-ounce can of evaporated milk, and 1/2 cup of butter. Now, as you mix these ingredients over medium heat, take a moment to appreciate how simple yet magical this combination is. Keep stirring—seriously, don’t stop—until everything is blended and smooth. You know you’ve hit the sweet spot when it’s all melted together nicely.
But here’s the kicker: you need to bring this mixture to a boil while stirring constantly. I mean, it’s like a workout for your arm, but if you don’t, you might end up with a burnt mess, and who wants that?
Once you see those bubbles turning into a proper boil, set your timer for 5 and a half minutes. Yes, I know, it feels like an eternity when all you can think about is that sweet fudge waiting to be devoured. Keep stirring, and whatever you do, don’t mistake the bubbling for boiling.
After the timer goes off, remove the saucepan from the heat. Now comes the fun part: it’s time to add in the rest of our goodies. Stir in that glorious 13-ounce jar of marshmallow cream, a teaspoon of salt for balance, and a teaspoon of vanilla because, let’s be honest, who doesn’t love the smell of vanilla wafting through the kitchen?
Next up are the stars of the show: 1 cup of chopped walnuts and those two bags of butterscotch chips. Stir until the butterscotch chips are melted and everything looks like a velvety dream. Finally, fold in 1 cup of candied cherries for that pop of color and sweetness.
Now, it’s time to transfer this heavenly mixture into a buttered 9×13 pan. You might want to grab a spatula or a spoon to help scrape every last bit into the pan—after all, it’s not just fudge, it’s magic. Smooth the top, and then let it cool.
You can put it in the fridge if you’re feeling impatient, but let’s be real, the waiting is part of the fun too. Once it’s set, cut it into squares, and there you have it: your very own batch of Christmas fudge. Make sure to share—if you can resist the urge to eat it all by yourself.
Christmas Fudge Substitutions & Variations
Have you ever wondered how to switch things up with your Christmas fudge? I love experimenting with different flavors and textures.
For a nutty twist, I sometimes swap walnuts for pecans or almonds. If you’re not a fan of butterscotch, try using milk chocolate or dark chocolate chips instead—the result is equally delightful!
You can also add a pinch of espresso powder for a rich, mocha flavor. Want a fruity touch? Toss in some dried cranberries or chopped apricots.
And if you’re feeling adventurous, sprinkle in some sea salt or a dash of peppermint extract for a festive kick. There are endless possibilities, so don’t be afraid to get creative with your fudge this holiday season!
What to Serve with Christmas Fudge
While planning your holiday gatherings, consider what to serve alongside your delicious Christmas fudge. For a well-rounded dessert table, I love pairing my fudge with a selection of cookies. Classic options like gingerbread or sugar cookies provide a nice contrast to the rich sweetness of the fudge.
You can also add some seasonal fruits, like sliced oranges or apples, to refresh the palate.
Hot beverages are a must, too! A cup of hot cocoa or spiced cider can enhance the festive vibes. If you want something more adult, a nice mulled wine works beautifully.
Don’t forget to include some nuts or popcorn for a crunchy texture that complements the fudge. These simple additions will create a delightful spread that everyone will enjoy!
Additional Tips & Notes
Before you plunge into making your Christmas fudge, keep a few tips in mind to guarantee it turns out perfectly.
First, make sure your ingredients are at room temperature; this helps everything blend smoothly. Use a heavy-bottomed saucepan to prevent burning, and don’t skip the constant stirring once it starts boiling.
If you want a smoother texture, consider using a candy thermometer to verify it reaches the right temperature. After pouring the fudge into the pan, let it cool completely before cutting; this helps achieve clean edges.
For a festive touch, sprinkle some extra chopped walnuts or colored sprinkles on top before it sets.
Finally, store your fudge in an airtight container; it’ll stay fresh longer! Enjoy your holiday treat!